How to confirm customer payments automatically (and stop checking your phone)
Payment apps don't tell your checkout when money lands, so you check and confirm every order by hand. Here's how to let the payment alerts you already get do it for you, step by step, with the real screens.
Utilica13 min read
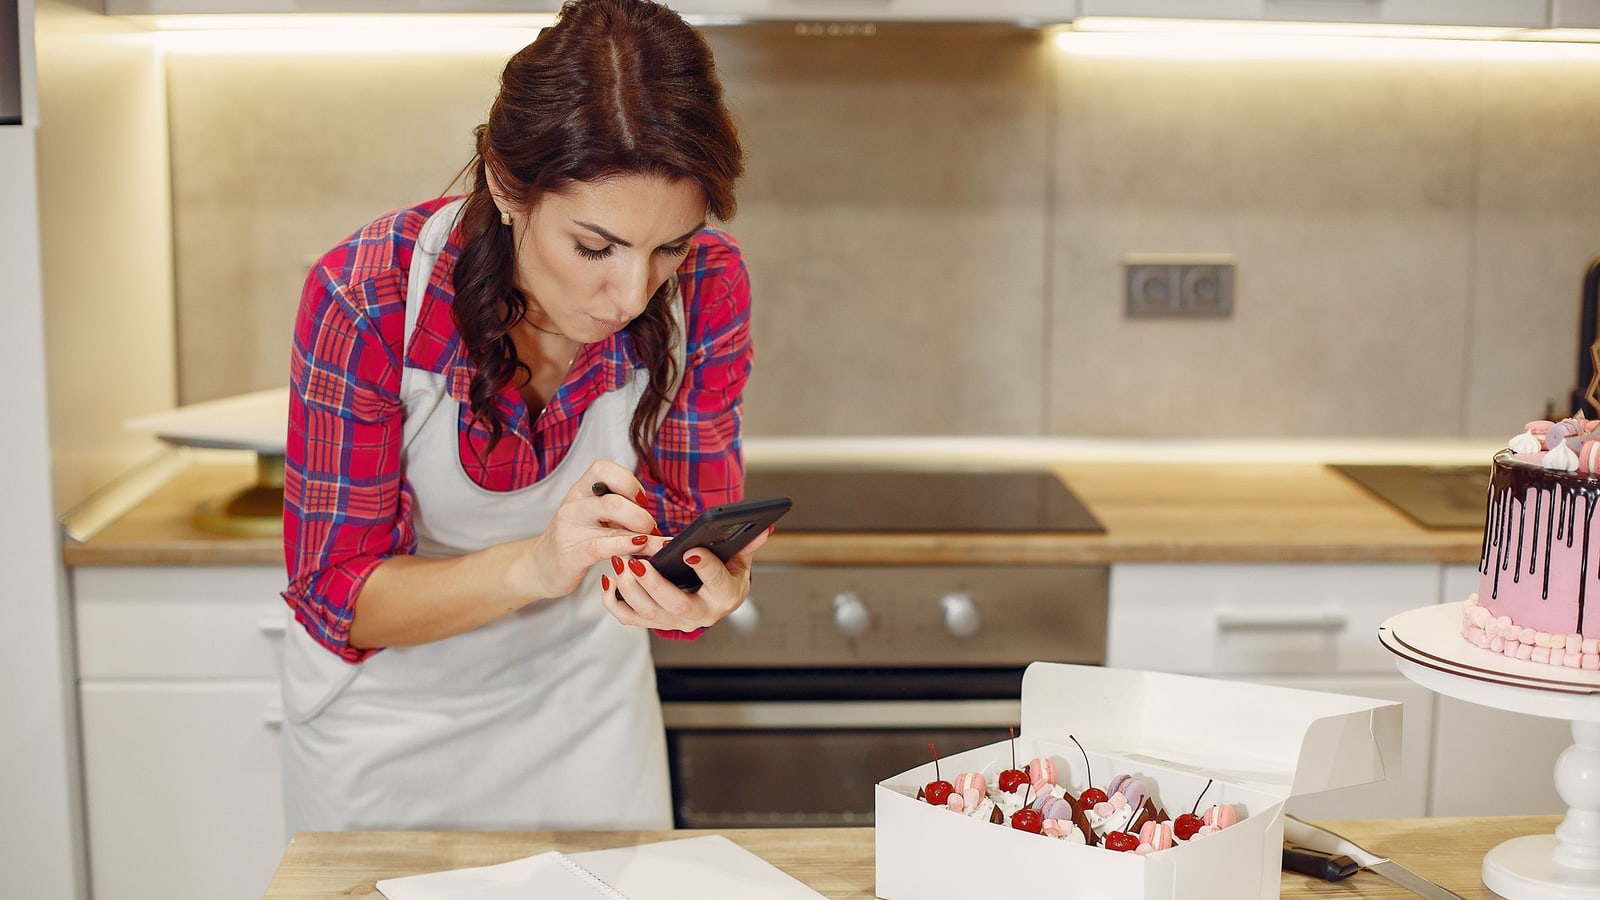
It's 12:40 on a Friday. There are six people at your window, two orders on the grill, and your phone buzzes. Then it buzzes again. Someone at the back of the line calls out, "I sent it, did you get it?"
You wipe your hands, unlock your phone, open your banking app, scroll past the coffee you bought this morning, find a $24 payment from someone called M. Rodriguez, and try to remember whether that was the birria tacos or the quesadilla. Then you open your orders and mark it paid. Then you do it again.
The money arrived in seconds. Confirming it is what took your time. This guide explains why that happens with payment apps, what it really costs you, and how to make it go away for good, so every paid order marks itself paid while you keep working.
The short version
If you only read one part, read this:
- Your bank and payment apps already email you an alert every time someone pays you.
- A filter in your own email can forward copies of just those alerts, and nothing else, to a private address.
- When an alert has the order number in the memo and the right amount, the order can be marked paid by itself.
- A one-dollar test proves the whole thing works before a real customer is waiting.
The rest of this post walks through each step with the real screens, covers the safety questions you should ask, and shares what we've learned from setting it up with real banks.
Why your checkout can't see the payment
Zelle, Cash App, Venmo and PayPal are wonderful for small businesses. Customers already have them, there's no card reader to buy, and on personal accounts there's usually no fee. The money goes straight from your customer's account to yours.
That directness is also the problem. A payment app moves money between two people, and only those two people are told about it. Your website isn't told. Your order list isn't told. Nobody but you and your customer knows the payment happened.
Card processors are different: when a card is charged, the processor sends a message to your checkout, and the order flips to paid by itself. Personal payment apps have no such message for small sellers. So every app payment ends the same way, with a person looking at a phone.
What confirming by hand really costs you
It doesn't feel like much: half a minute here, a minute there. But it adds up in ways that are easy to miss.
- Time. Say confirming one payment takes about 30 seconds once you've stopped, unlocked your phone, found the payment and marked the order. At 40 app payments a day, that's 20 minutes a day, or around 10 hours a month, spent being a human notification system.
- Mistakes. Two customers both pay $12. One wrote a note, one didn't. Under pressure it's easy to mark the wrong order, or to miss one entirely and ask a customer to pay twice.
- Waiting customers. While you check, the line waits. Customers who paid and then stand around wondering whether you saw it don't come away with a great impression.
- Screenshots. Some sellers start accepting "here's my screenshot" as proof just to keep the line moving. Fake payment screenshots are a well-known trick, and a picture of a payment is not a payment.
The alert you already get is the proof
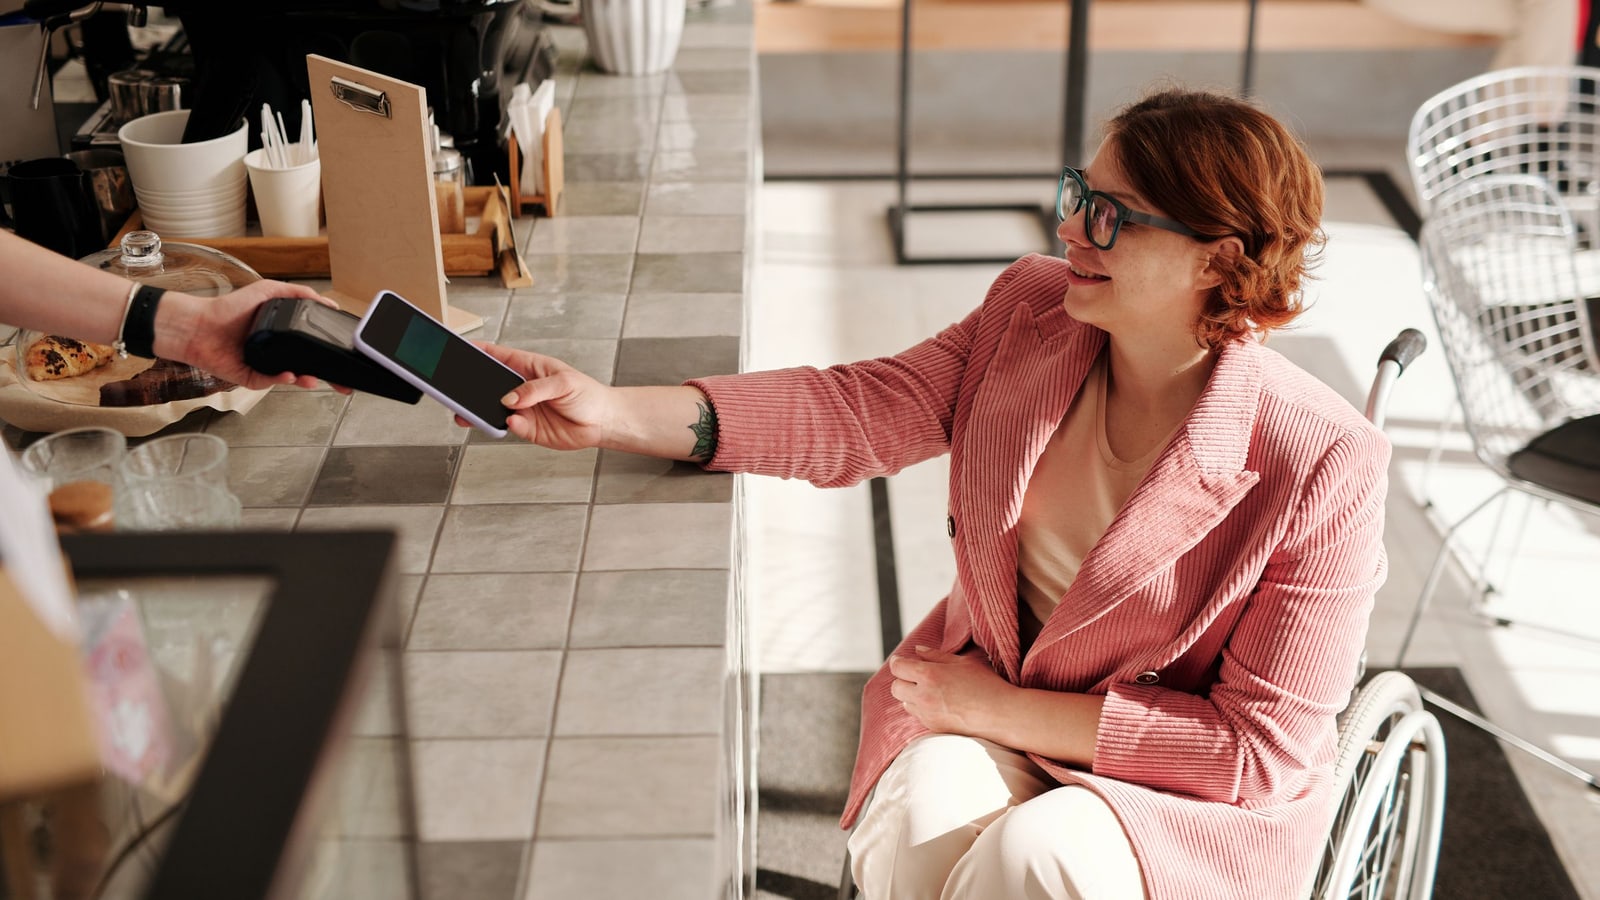
Here's the part most sellers overlook: your bank and payment apps do tell someone when money arrives. They email you.
A typical Zelle alert from a bank says something like "You received money with Zelle," then shows who sent it, the amount, the date, a transaction number, and the memo the customer typed. Cash App sends "Payment received" with the name, the amount and the note. Venmo sends "Sam paid you $18.00." PayPal sends "You've got money."
Those emails contain everything needed to confirm an order: who paid, how much, and, if the memo has the order number, exactly which order it was for. They also carry something you can't see: a digital signature that proves which company sent them. More on why that matters below.
All that's missing is something that reads those alerts the moment they arrive and updates the right order.
How auto-confirm works
Auto-confirm is the part of Utilica that does that reading. It has four parts:
- The alert. Your bank or payment app emails you when someone pays, like it does today.
- The filter. A filter in your own email forwards a copy of that alert, and only alerts like it, to your private Utilica address. The original stays in your inbox.
- The match. Utilica checks the alert really came from your bank or app, reads the amount, the payer and the memo, and finds the order it pays.
- The receipt. The order is marked paid, your customer's order page turns into a receipt, and you get an alert.
You set it up once, per payment app, and it takes about five minutes. Here's what that looks like.
Watch the setup
This is the real setup screen from the Utilica dashboard, playing through on its own. You can pause it, start over, or press Try it yourself and click through it. It runs on pretend data, so nothing is saved.
1 · Pick your bankPress play to watch the setup.
Step by step: setting it up
In your Utilica dashboard, open Integrations, then Payments. Under Confirm payments automatically you'll see a card for each payment app. Open the one you want to set up. Each card has its own steps and checks each one as you go.
Step 1: Pick your bank
This step is only for Zelle. Zelle alerts come from your bank, not from Zelle, and every bank words them differently and sends them from its own address. So the first thing to do is pick your bank from the list.
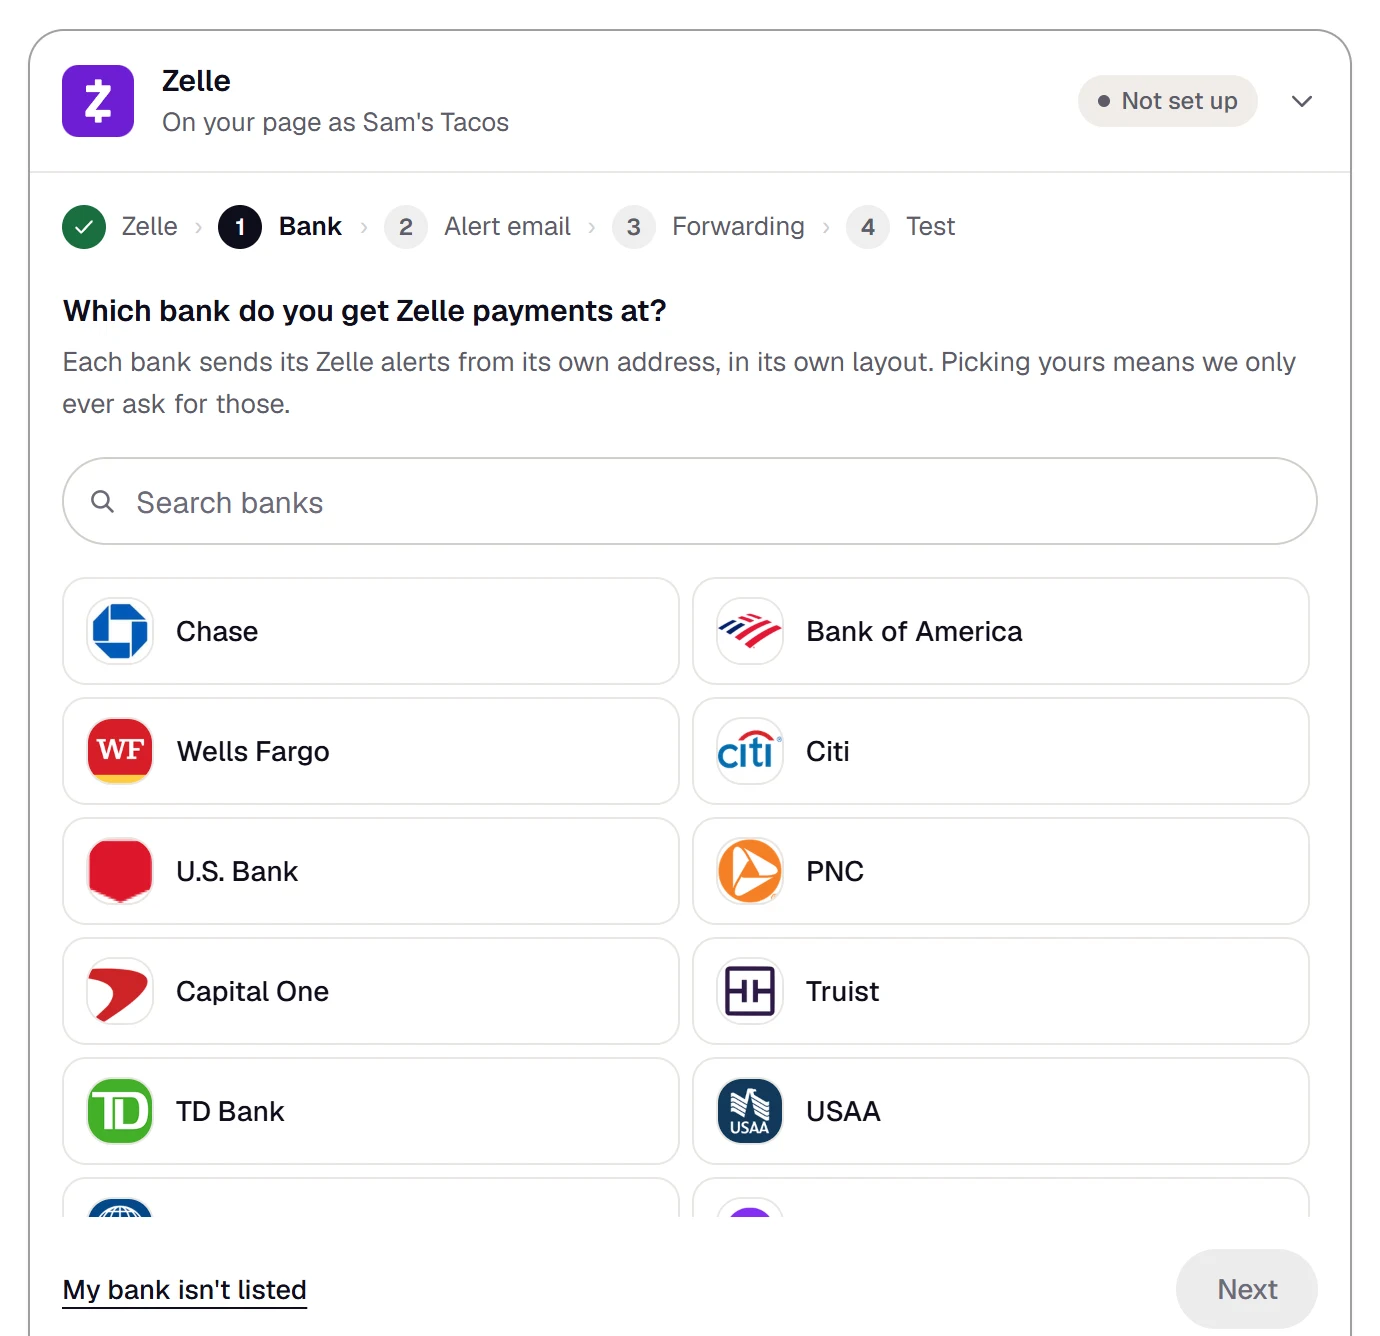
There are 29 U.S. banks and credit unions on the list today, including Chase, Bank of America, Wells Fargo, Citi, U.S. Bank, PNC, Capital One, Truist, TD Bank, USAA and Navy Federal.
If your bank isn't listed, you have two options. You can forward us one real "you received money" Zelle alert from your bank, and Utilica learns who sends them; you confirm it's right and carry on. Or you can request your bank, and it gets added to the list for everyone who banks there.
Step 2: Turn on the alert, and check where it goes
This is the step people most often miss. Many banks leave the Zelle email alert off, or only send it as a text message. If your bank never emails you about a payment, there's nothing to forward.
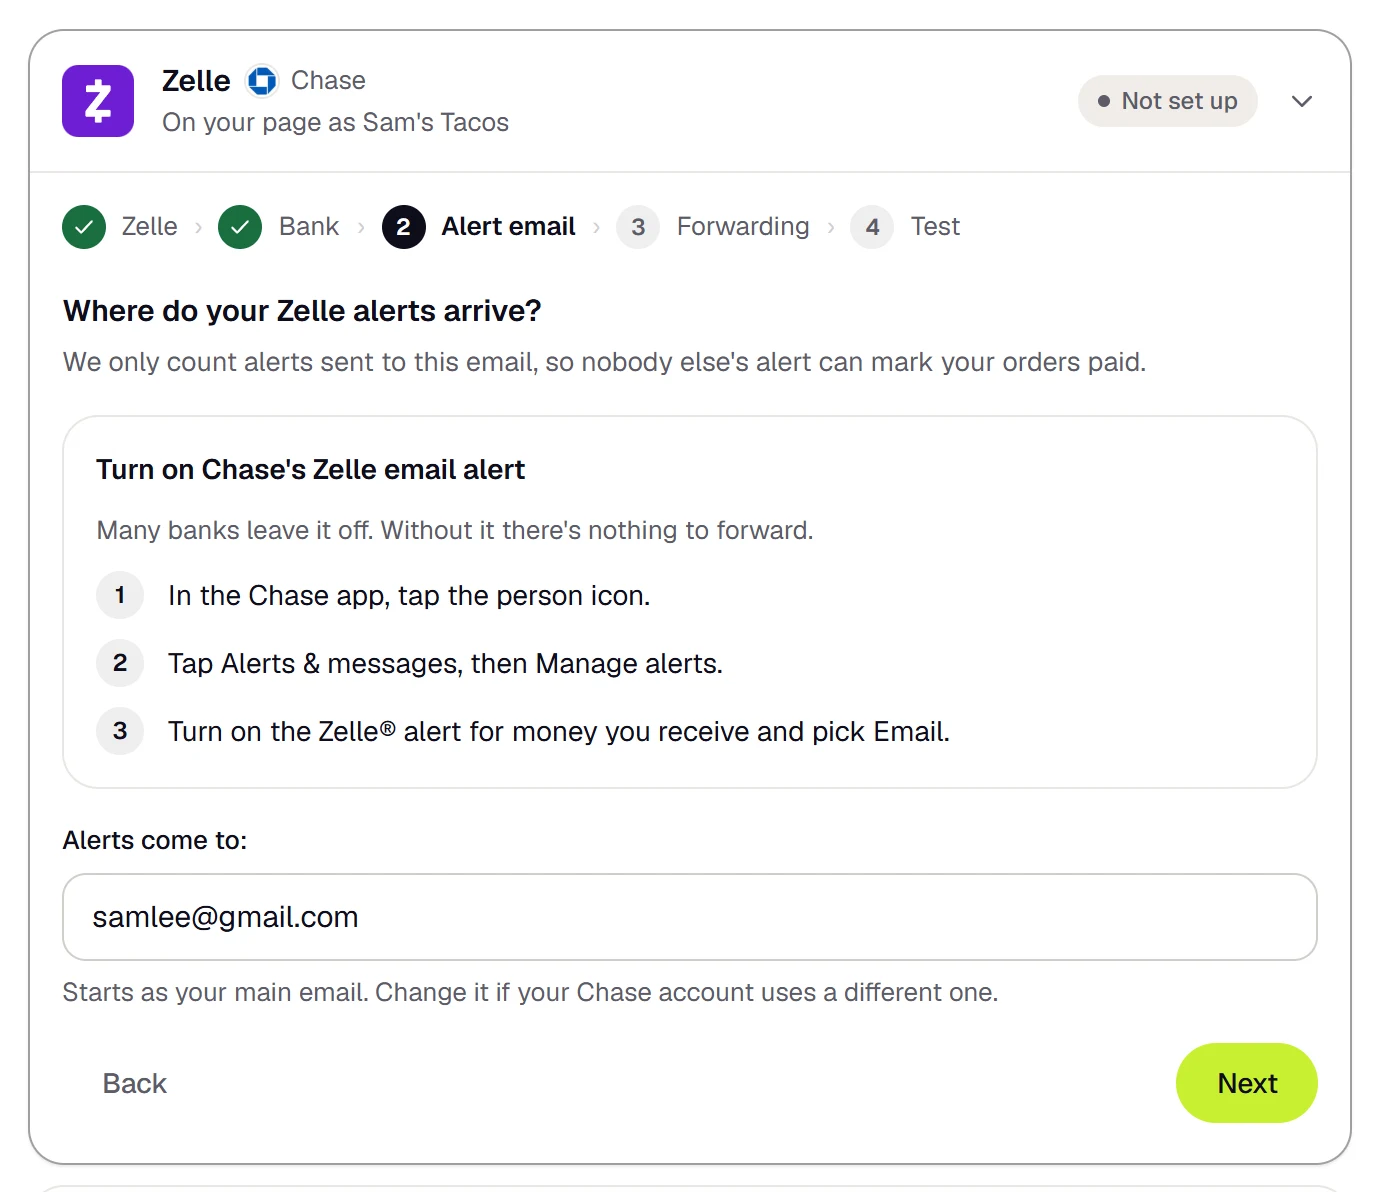
The setup shows you exactly where to switch it on for your bank, usually a few taps under Profile, Settings or Alerts in your bank's app. Some banks, like Bank of America, Wells Fargo and U.S. Bank, send it on their own to the email you enrolled in Zelle. Others need you to turn it on.
Then check the Alerts come to box. It starts as your main email, but if your bank account or your Cash App uses a different email address, change it here. Each payment app can have its own. That matters, because Utilica only accepts alerts sent to the addresses you list here: someone else's alert can't mark your orders paid.
Step 3: Forward only the payment alerts
Now the filter. You don't hand anyone your password or your inbox. You make a rule in your own email that says: when an email comes from my bank's alert address with "Zelle" in the subject, forward a copy to this address. Everything else is left alone.
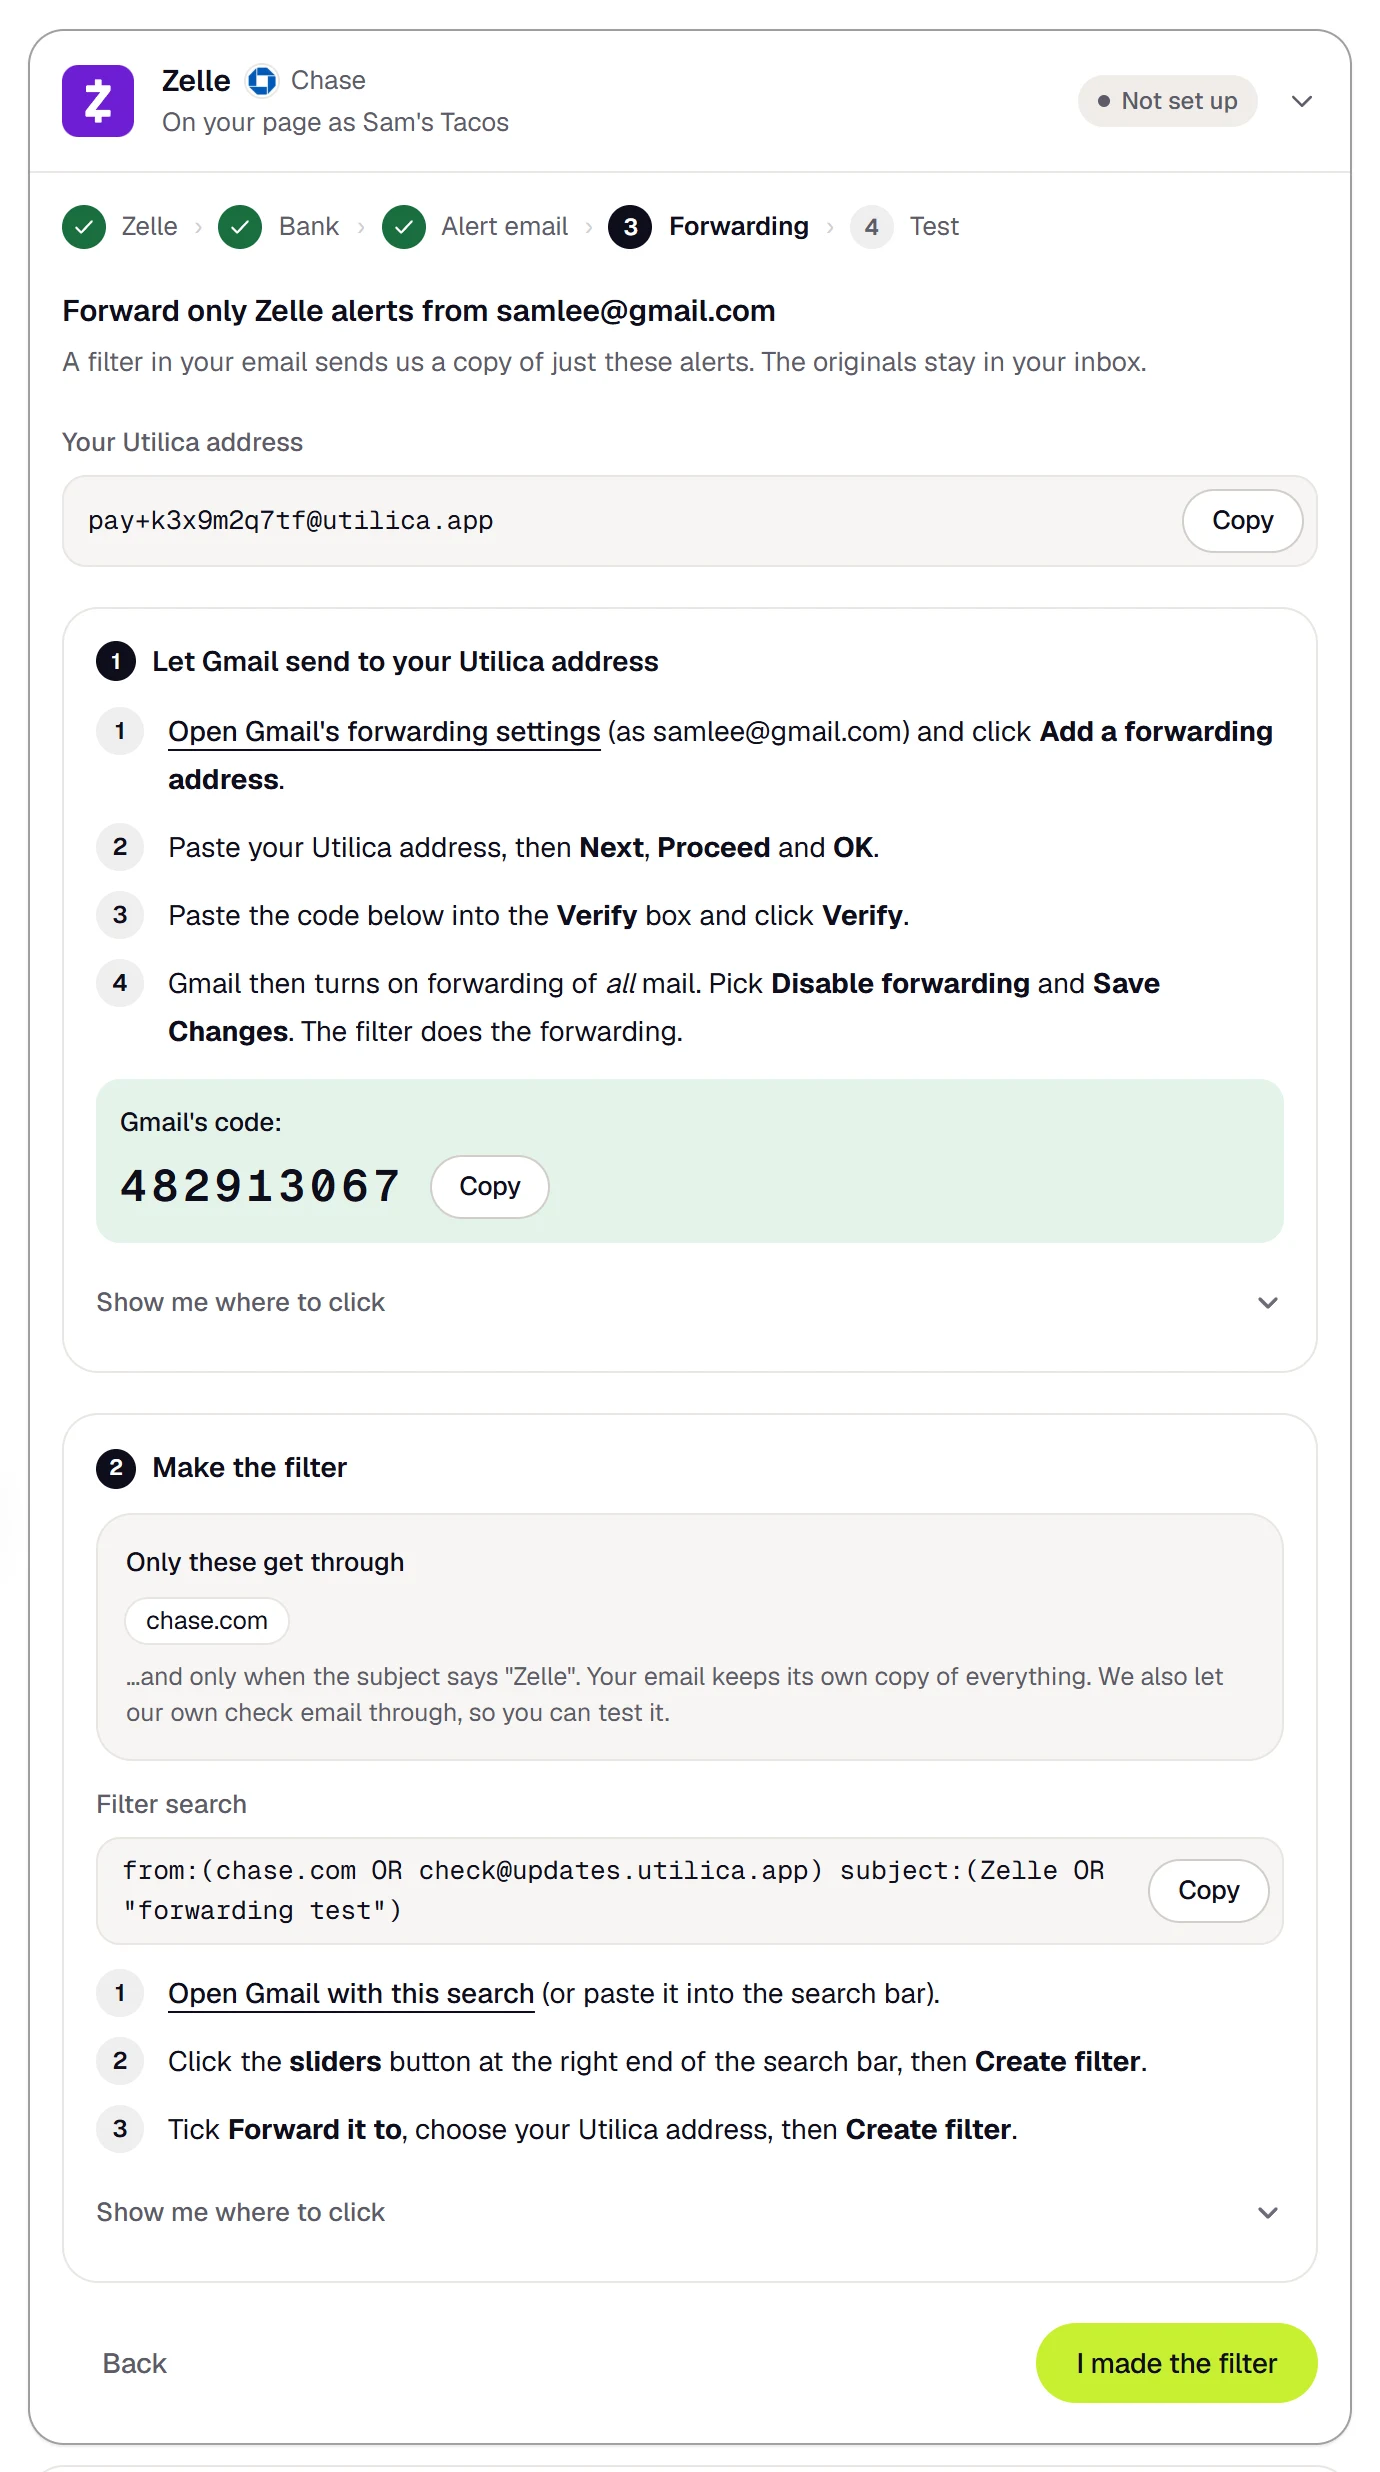
Utilica writes the filter for you, for your email service:
- Gmail and Google Workspace. Gmail asks you to confirm any address you forward to. When you add your Utilica address in Gmail's forwarding settings, Gmail emails a confirmation code to it, and that code appears on your setup screen a few seconds later, so you can paste it straight back into Gmail. One thing to watch: after you confirm, Gmail switches on forwarding of all your mail. Pick Disable forwarding and save. The filter does the forwarding, not that setting. Then open Gmail with the search Utilica gives you, press the sliders button, choose Create filter, tick Forward it to and pick your Utilica address.
- Outlook and Microsoft 365. Add a rule: from the senders shown, with the subject words shown, and Redirect to your Utilica address.
- iCloud Mail. Add a rule in iCloud's settings for each item shown, forwarding to your Utilica address.
- Yahoo and AOL Mail can only forward everything, not just some emails, so they can't be used for this. If your alerts go to one of those, point them at a Gmail, Outlook or iCloud address instead.
Step 4: Send yourself $1
The last step proves the whole chain at once. From another account, yours or a friend's, send $1.00 to your business with the short code shown on screen in the memo.
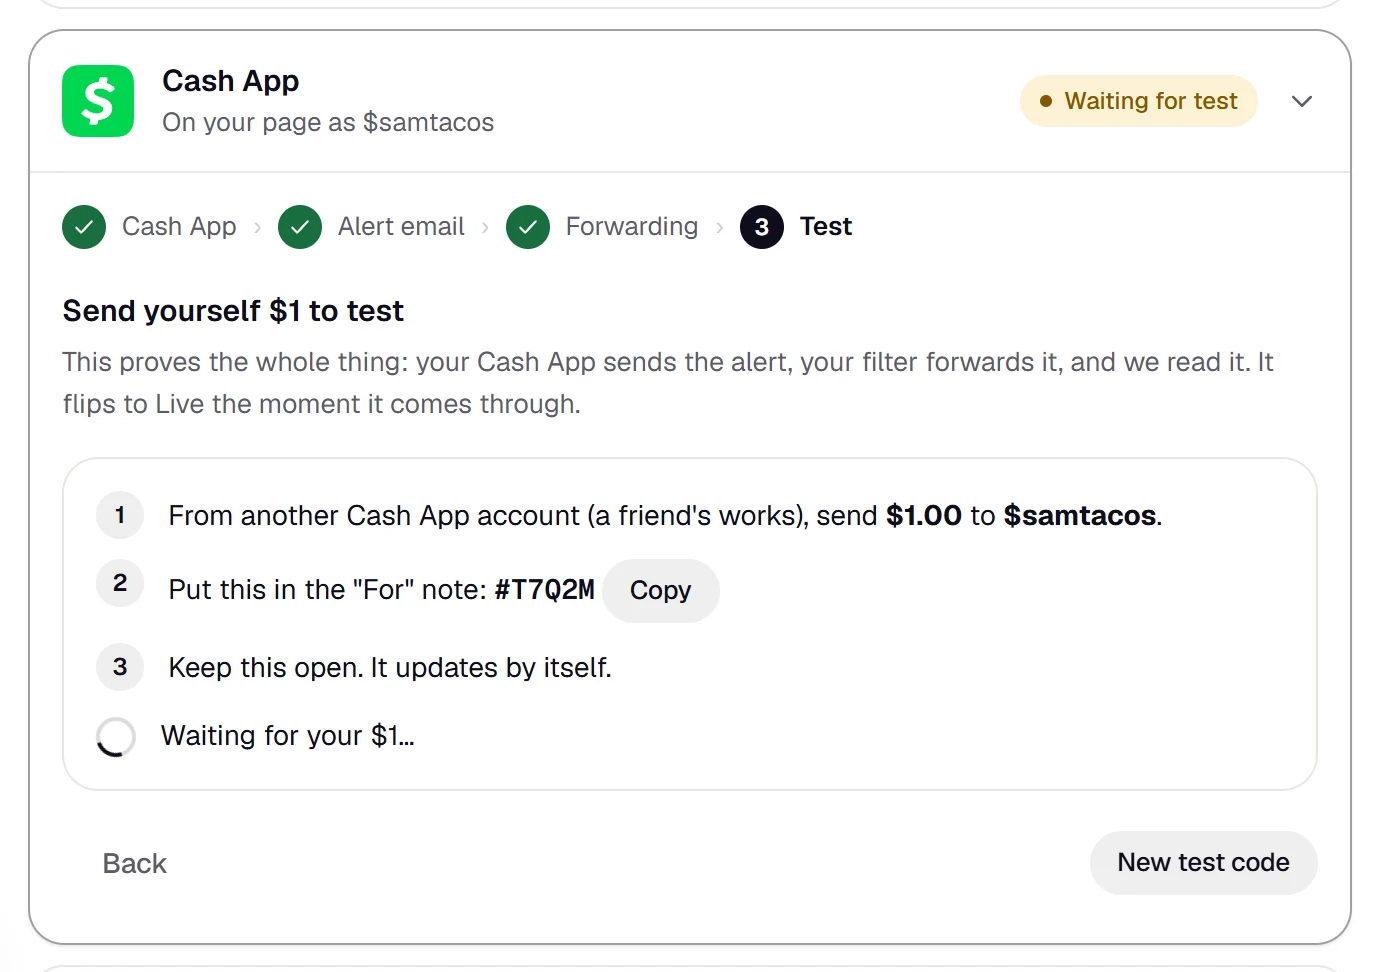
When the alert lands, your bank sent it, your filter forwarded it, and Utilica read it. The card switches to Live, and from then on, matching payments confirm orders by themselves.
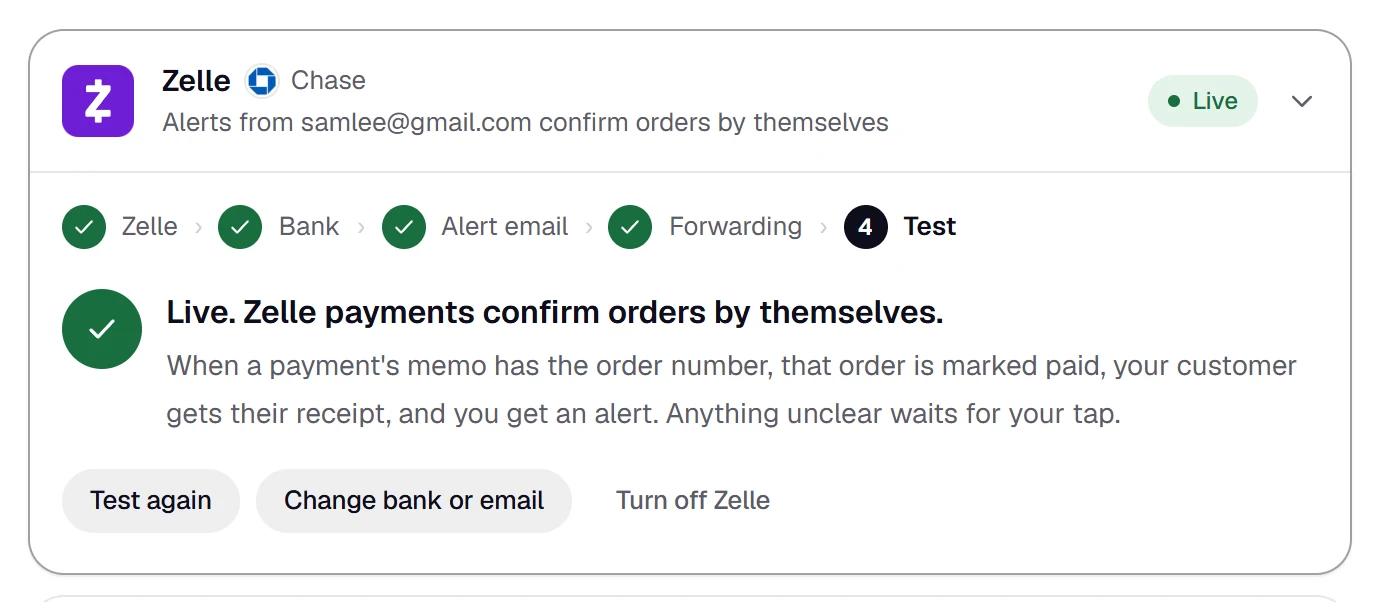
If the test doesn't arrive within a couple of minutes, the setup suggests what to check: whether the alert reached your inbox at all (if not, it's still off at your bank), whether it landed in Spam, and whether the filter is forwarding. There's a Check forwarding button that sends a test email through your filter, so you can tell a filter problem from an alert problem.
How a payment finds its order
Every Utilica order has a short number, like #K7Q2M, and it's put in the payment note for your customer. Venmo fills it in for them; for the other apps it's shown to copy. Here's how a payment is matched:
- The order number is in the memo, and the amount covers the order. That order is marked paid. This is the common case.
- There's no order number, but exactly one open order matches both the amount and the customer's name. That order is marked paid.
- Anything less certain isn't guessed. More on that next.
And a few things are always true: one payment can never pay two orders, a payment that's less than the order doesn't mark it paid, and orders older than your matching window aren't considered.
Under Advanced you can tune this to how you work. You can change how far back orders are matched, allow a little leeway on the amount (handy if customers round up or add a tip), or require the order number in every memo.
When it isn't sure, you get one tap
Two customers order the same $18 box of conchas a few minutes apart, and one of them pays without the order number in the memo. Which order is it for? A system that guesses will sometimes guess wrong, and a wrong guess means handing over the wrong order.
So auto-confirm doesn't guess. You get a notification and an email with the likely orders, and the payment shows at the top of your Integrations page:
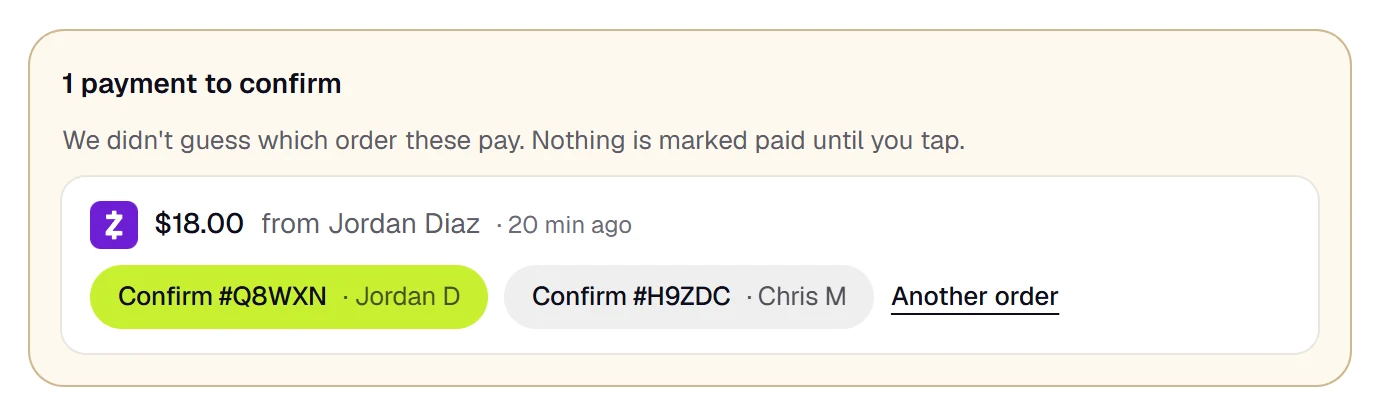
One tap on the right order marks it paid and sends your customer their receipt. Until then, nothing changes.
Is it safe?
It's the right question to ask about anything that touches your email and your money. Here's how auto-confirm is built:
- A filter, not a login. Utilica never signs in to your email, your bank or your payment apps, and can't see or move your money. It only ever sees what your own filter sends it.
- Your inbox stays yours. The filter forwards copies. The originals stay where they are, and everything that isn't a payment alert never leaves your inbox.
- Read once, then deleted. Each forwarded email is read the moment it arrives and deleted straight away. What's kept is the amount, who paid, the payment's reference number and the order it paid. Records of payments that matched no order are deleted after 14 days, and all of them after 90 days.
- Fake alerts don't count. Real bank and app emails are digitally signed by the company that sent them. Auto-confirm only accepts alerts with a valid signature from the bank or app itself, sent to your own email address. A look-alike email from anyone else is ignored, however convincing it looks.
- Off whenever you like. Delete the filter and forwarding stops instantly. Or press Turn off in your dashboard.
You can read the details in our Privacy Policy.
One honest caveat: an alert isn't the money itself. Banks and apps can occasionally hold or reverse a payment after they've sent the alert. For everyday orders that's rare, but for a large or unusual payment, it's still worth a glance at your account before you hand over something expensive.
What your customers notice
Mostly, that nothing gets in their way. They pay in the app they already use, with the amount and the order number filled in or ready to copy. Their order page used to ask them to tap "I've sent the payment" and then wait for you. Now it says it will confirm by itself, and a moment after the payment lands, it turns into their receipt.
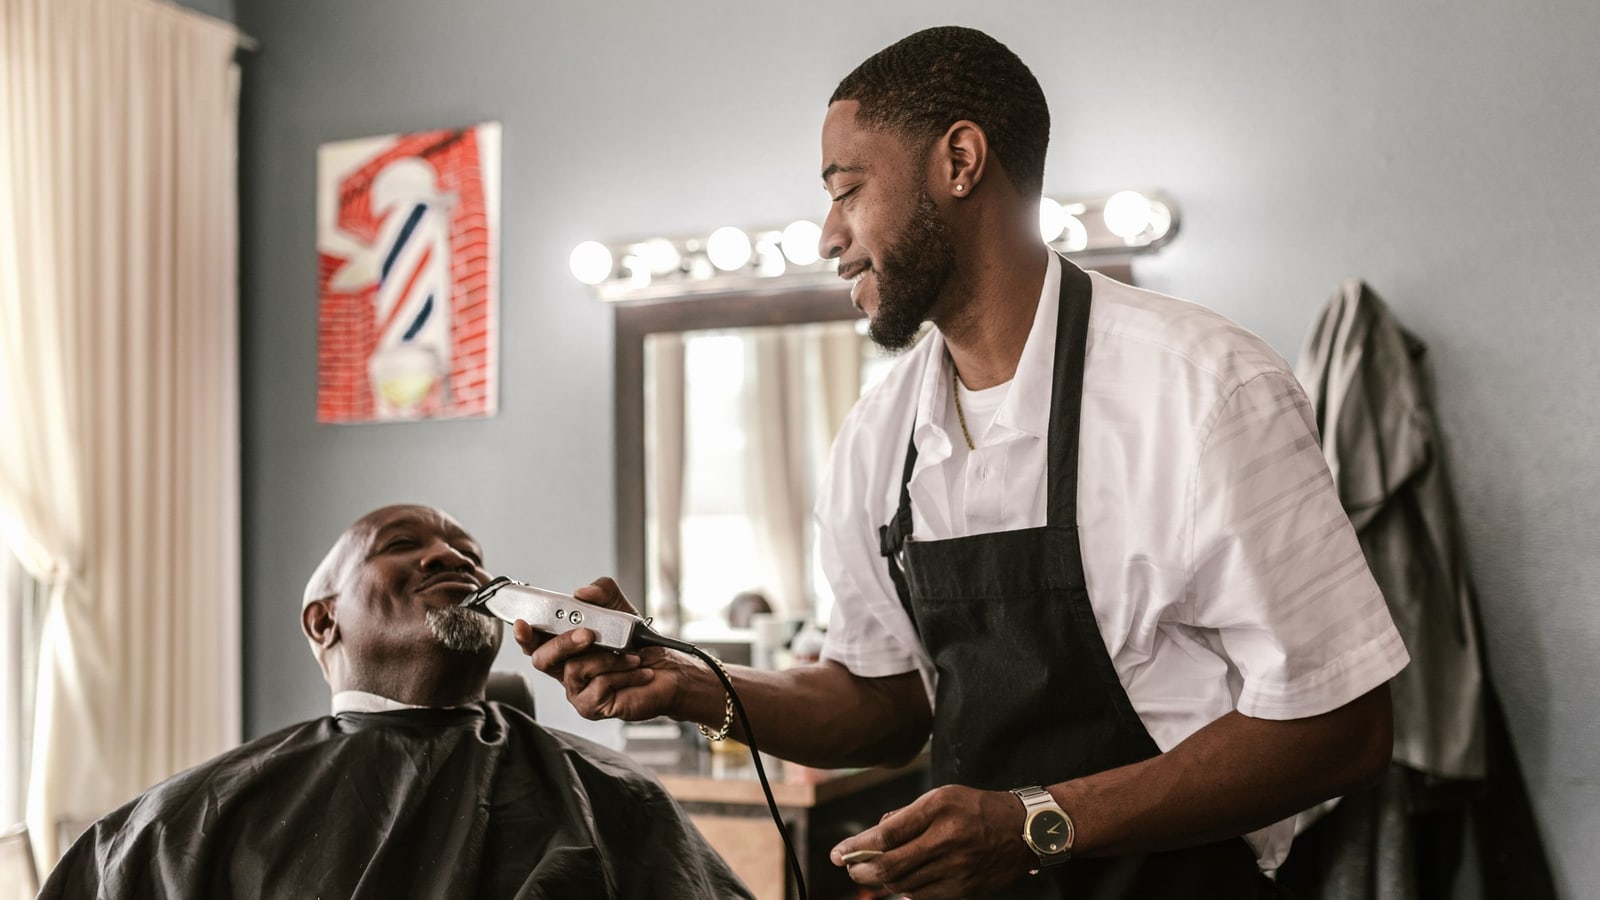
For a barber or stylist mid-cut, it means a deposit is confirmed without putting the clippers down. For a food truck, it means paid orders show up as paid without you stopping to check. For anyone selling digital products, files and tickets hand over the moment the payment is matched.
Tips for getting the most out of it
- Keep the order number in the memo. It's the fastest, surest match. If customers delete it, a payment can still match on amount and name, but anything unclear comes to you.
- Use one email for alerts if you can. You can set a different email for each app, but each one needs its own filter.
- If alerts ever stop, check the alert first. If your bank stops emailing you, there's nothing to forward, so make sure the alert is still switched on.
- Look in Spam once. If an alert ever lands in Spam, mark it "Not spam" so your filter sees the next one.
- Turn on text alerts. On Pro, you can get a text the moment an order is paid, which is handy when you're away from the counter.
Common questions
Does it cost anything? No. Auto-confirm is on every Utilica plan, including Free, and Utilica takes no fee on payments made in these apps.
Which apps work? Zelle (through your bank), Cash App, Venmo and PayPal.
Can I use it for some apps and not others? Yes. Each app has its own card, and you can set up one, two or all four.
What if my bank changes how its alerts look? If an alert from your bank ever can't be read, the reason shows at the top of your Integrations page, nothing is marked paid by mistake, and you confirm that order by hand as before.
Does my customer need to do anything differently? No. They pay exactly as they do now.
Who it's for
Auto-confirm is built for businesses that take app payments all day and can't stop to check every one: food trucks and restaurants, bakeries and cafes, barbers, stylists, nail and lash techs, and anyone taking deposits or selling at markets and pop-ups.

If you take more than a handful of app payments a week, the five minutes it takes to set up pay for themselves on the first busy day.
Get started
- Make a free Utilica page and add the payment apps you take.
- In Integrations, open Confirm payments automatically and pick an app.
- Follow the four steps, and send yourself $1.
Want every detail first? The step-by-step guide in our help center covers each email service, what to do if your bank isn't listed, and what to check if a test doesn't arrive.
Photos from Pexels by Gustavo Fring, Marcus Aurelius, RDNE Stock project and Hanna Pad.


